Table of contents
- Key Takeaways
- System Requirements Checklist
- How to Enable Virtualization in BIOS on Windows 10 and 11
- How to Enable Virtualization in BIOS on ASUS
- How to Enable Virtualization in BIOS on HP
- How to Enable Virtualization in BIOS on Lenovo
- How to Enable Virtualization in BIOS on Dell
- How Syncro Fits Into This Workflow
- Try Syncro’s platform-agnostic IT tools
- Frequently Asked Questions About Enabling Virtualization in BIOS
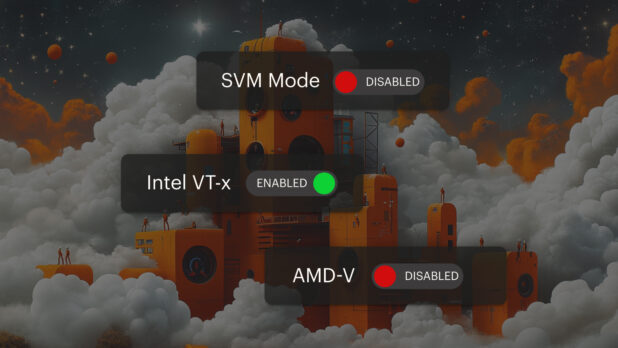
To enable virtualization in BIOS, restart the machine and enter BIOS/UEFI setup (commonly Del, F2, or F10 at boot), find the virtualization setting (Intel VT-x, AMD-V, or SVM Mode) under Advanced or CPU Configuration, set it to Enabled, then save and exit. Confirm it worked in Task Manager > Performance > CPU, where Virtualization should read “Enabled.”
Key Takeaways
- Virtualization must be enabled in BIOS to run virtual machines, containers, and features like Hyper-V or WSL.
- The setting is called Intel VT-x (Intel) or AMD-V / SVM Mode (AMD), and many manufacturers ship it disabled by default.
- The BIOS entry key and menu location vary by manufacturer. Steps for Windows, ASUS, HP, Lenovo, and Dell are below.
- The whole process takes about 10 minutes. Verify success in Task Manager > Performance > CPU.
- Prerequisites: a CPU and OS that support virtualization, an up-to-date BIOS, and adequate RAM for the workload you plan to run.
Enabling virtualization in BIOS is essential for running virtual machines and containerized applications, and for testing software across operating systems without separate hardware. Some manufacturers disable it by default, but turning it on is straightforward and takes about 10 minutes.
The steps below are organized by hardware manufacturer.
System Requirements Checklist
Before you start, confirm:
- Processor supports virtualization: Intel VT-x (Intel) or AMD-V (AMD). Verify on the manufacturer site or with CPU-Z. (Intel ARK, AMD product specs.)
- Operating system is compatible: Windows 10 Pro/Enterprise or Windows 11. Note: Microsoft ended support for Windows 10 in October 2025, so plan to run virtualization workloads on Windows 11.
- BIOS is up to date: Update the BIOS if it is out of date.
- RAM is adequate: At least 8 GB to enable virtualization and run a single VM. Actual requirements depend on the OS and app being deployed more than on the hardware platform.
How to Enable Virtualization in BIOS on Windows 10 and 11
- Restart the computer and enter BIOS/UEFI by pressing the appropriate key during boot.
- Go to Advanced Settings or CPU Configuration.
- Find the virtualization option: Intel VT-x, AMD-V, or SVM Mode (AMD).
- Set it to Enabled.
- Save and exit (usually F10, then confirm).
- Verify: after rebooting, open Task Manager > Performance > CPU and confirm Virtualization shows Enabled.
In Windows 11, you can also reach BIOS via Settings > System > Recovery > Advanced startup > UEFI Firmware Settings. Enable Hyper-V to support virtualization.
How to Enable Virtualization in BIOS on ASUS
- Restart and press DEL or F2 to enter BIOS.
- Press F7 for Advanced Mode.
- Go to Advanced > CPU Configuration.
- Find Intel Virtualization Technology (Intel) or SVM Mode (AMD).
- Set it to Enabled.
- Press F10 to save and exit.
- Restart and verify in Task Manager.
How to Enable Virtualization in BIOS on HP
- Restart and press F10 to enter BIOS.
- Select the Configuration tab.
- Locate Virtualization Technology (VTx/VTd) and enable it.
- Save and exit (F10, confirm).
- Reboot and check virtualization status in Windows.
How to Enable Virtualization in BIOS on Lenovo
Tablets and notebooks: 1. Restart and press F1 to enter BIOS. 2. Go to Security > Virtualization and press Enter. 3. Select Intel(R) Virtualization Technology and press Enter. 4. Choose Enable, press Enter. 5. Press F10, then Enter on Yes to save.
Desktops: 1. Restart and press F1 to enter BIOS. 2. Go to Advanced and press Enter on CPU Setup. 3. Select Intel(R) Virtualization Technology and press Enter. 4. Choose Enable, press Enter. 5. Press F10, then Enter on Yes to save.
How to Enable Virtualization in BIOS on Dell
- Reboot and press F2 during startup to enter BIOS.
- Select Virtualization Support > Virtualization.
- Set Virtualization to Enabled.
- Enable Virtualization for Direct-IO (VT-d).
- Save and exit.
How Syncro Fits Into This Workflow
Checking and configuring virtualization on one machine is quick. Confirming virtualization readiness and tracking hardware configurations across a managed fleet is where it gets time-consuming.
Syncro helps IT teams and MSPs monitor hardware configurations across their managed devices, and the scripting engine lets you query virtualization status and standardize settings at scale. For full visibility into what is on the network, endpoint management tracks device health and specs from one console.
Try Syncro’s platform-agnostic IT tools
Whether you are checking virtualization readiness or managing devices across mixed hardware, Syncro gives IT teams the tools to configure and monitor environments from one place.
See how Syncro helps IT teams manage endpoints · Start a free trial
Frequently Asked Questions About Enabling Virtualization in BIOS
It turns on the CPU’s hardware virtualization extensions (Intel VT-x or AMD-V), which let the machine run virtual machines, containers, and features like Hyper-V and Windows Subsystem for Linux. Without it, virtualization software either will not run or runs poorly.
Open Task Manager, go to the Performance tab, select CPU, and look for “Virtualization.” If it reads “Enabled,” you are set. If it reads “Disabled,” follow the BIOS steps for your manufacturer.
They are the equivalent hardware virtualization technologies for Intel and AMD processors. On AMD systems the BIOS setting is often labeled “SVM Mode.” Functionally, both enable the same capability.
Manufacturers disable it for a mix of reasons: reducing the attack surface from hypervisor-layer exploits, ensuring broad hardware compatibility, and giving organizations control over whether VMs can run.
Not for agent-based RMM tools like Syncro. Agentless RMM tools that rely on virtualization do require it, but Syncro’s agent runs without enabling BIOS virtualization.
It varies by manufacturer: commonly Del or F2 (ASUS, Dell), F10 (HP), or F1 (Lenovo). The correct key usually flashes on screen during boot, or check the manufacturer’s documentation.
Update the BIOS to the latest version first, since older firmware may not expose the setting. If it is still missing, confirm your specific CPU supports virtualization on the manufacturer’s spec page.

Share
Related Resources